The one thing that most strongly indicates whether or not you’ll success with your fitness goals is whether or not you track your intake. It doesn’t matter if you’re interested in weight loss, building strength, distance running, maintaining mobility, or any other fitness goal, garbage in results in garbage out. The most common way to track intake is MyFitnessPal, and I know that many of us here in GlibFit use it. However, there are plenty of MFP tips and tricks that you may not be aware of.
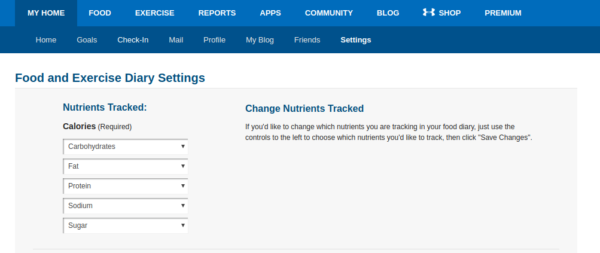
First, you can adjust which nutrients are tracked in the food diary. This is helpful if you are sensitive to certain micros, sodium for instance. It’s also helpful for macro tracking, which will be covered next week.
Second, you should be familiar with your profile and goal settings.

The information you provide here sets up all of the day-to-day numbers for MFP, including your calorie goal, your macros goals, etc. As you progress toward your goal, it’s good to check back in and make sure that MFP is configured to your life as it is currently.
Third, you should regularly track your fitness. People are notoriously bad at guessing how much food they have consumed, how many calories they have burned, and how much weight they have gained or lost. Even if you are on a purely strength building goal, tracking your progress will give you insights that you couldn’t have seen otherwise. MFP has a report function to aggregate your data.

Mrs. trshmnstr recommends relying on your Garmin/Apple watch/whatever whenever possible for tracking exercise. Most smart watches can integrate with MFP, and the data they provide will be substantially more accurate than if you manually enter the data. However, if you’re pounding the treadmill or doing weights work, your wearable isn’t going to be too much help.
Finally, Mrs. trshmnstr wants me to stress and stress again that what you don’t track, you don’t control! You may be able to make some progress by haphazardly changing your eating habits and haphazardly tossing weight around at the gym, but the pros track the minutae of food intake and of exercise in order to better understand how to best achieve their goals. It’s a bit of a burden to start, but once you get used to it, you’ll reap the rewards.
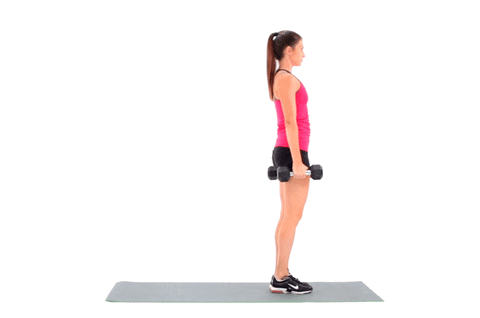
HIIT training of the week
As always, Mrs. trshmnstr recommends giving this a try 3 or 4 days this week. Also, please don’t kill yourself on these exercises. There’s a different between pushing yourself healthily beyond your comfort zone and blindly pushing your body into dangerous territory. Modify the exercises if you’re not capable of completing them as written.
Set a timer to start counting up from 0:00. Each exercise listed is a 1 minute workout. If you complete it before the minute is up, the rest of the minute is a rest period. If you haven’t completed it by the end of the minute, switch to the next exercise. Each exercise has an alternate for if you are unable to do that specific exercise. These are all fairly common exercises, so search for them if you don’t know them.
5 rounds of:
- 24 dumbbell reverse lunges (alternate: 24 weighed squats)
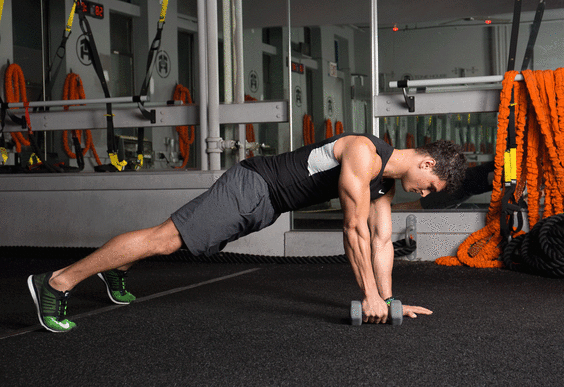
- 12 pushups (alternate: 12 bicep curls)
- 15 dumbbell thrusters (squat to overhead press) (alternate: 15 shoulder press)

- 14 plank low rows (alternate: 14 single arm bent-over low row)
- 10 burpees (alternate: 30 jumping jacks)
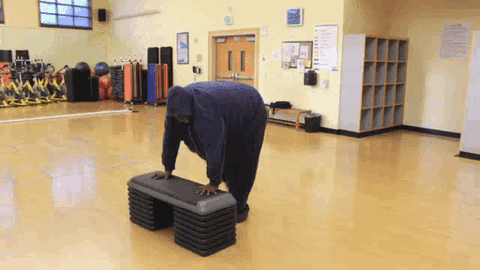
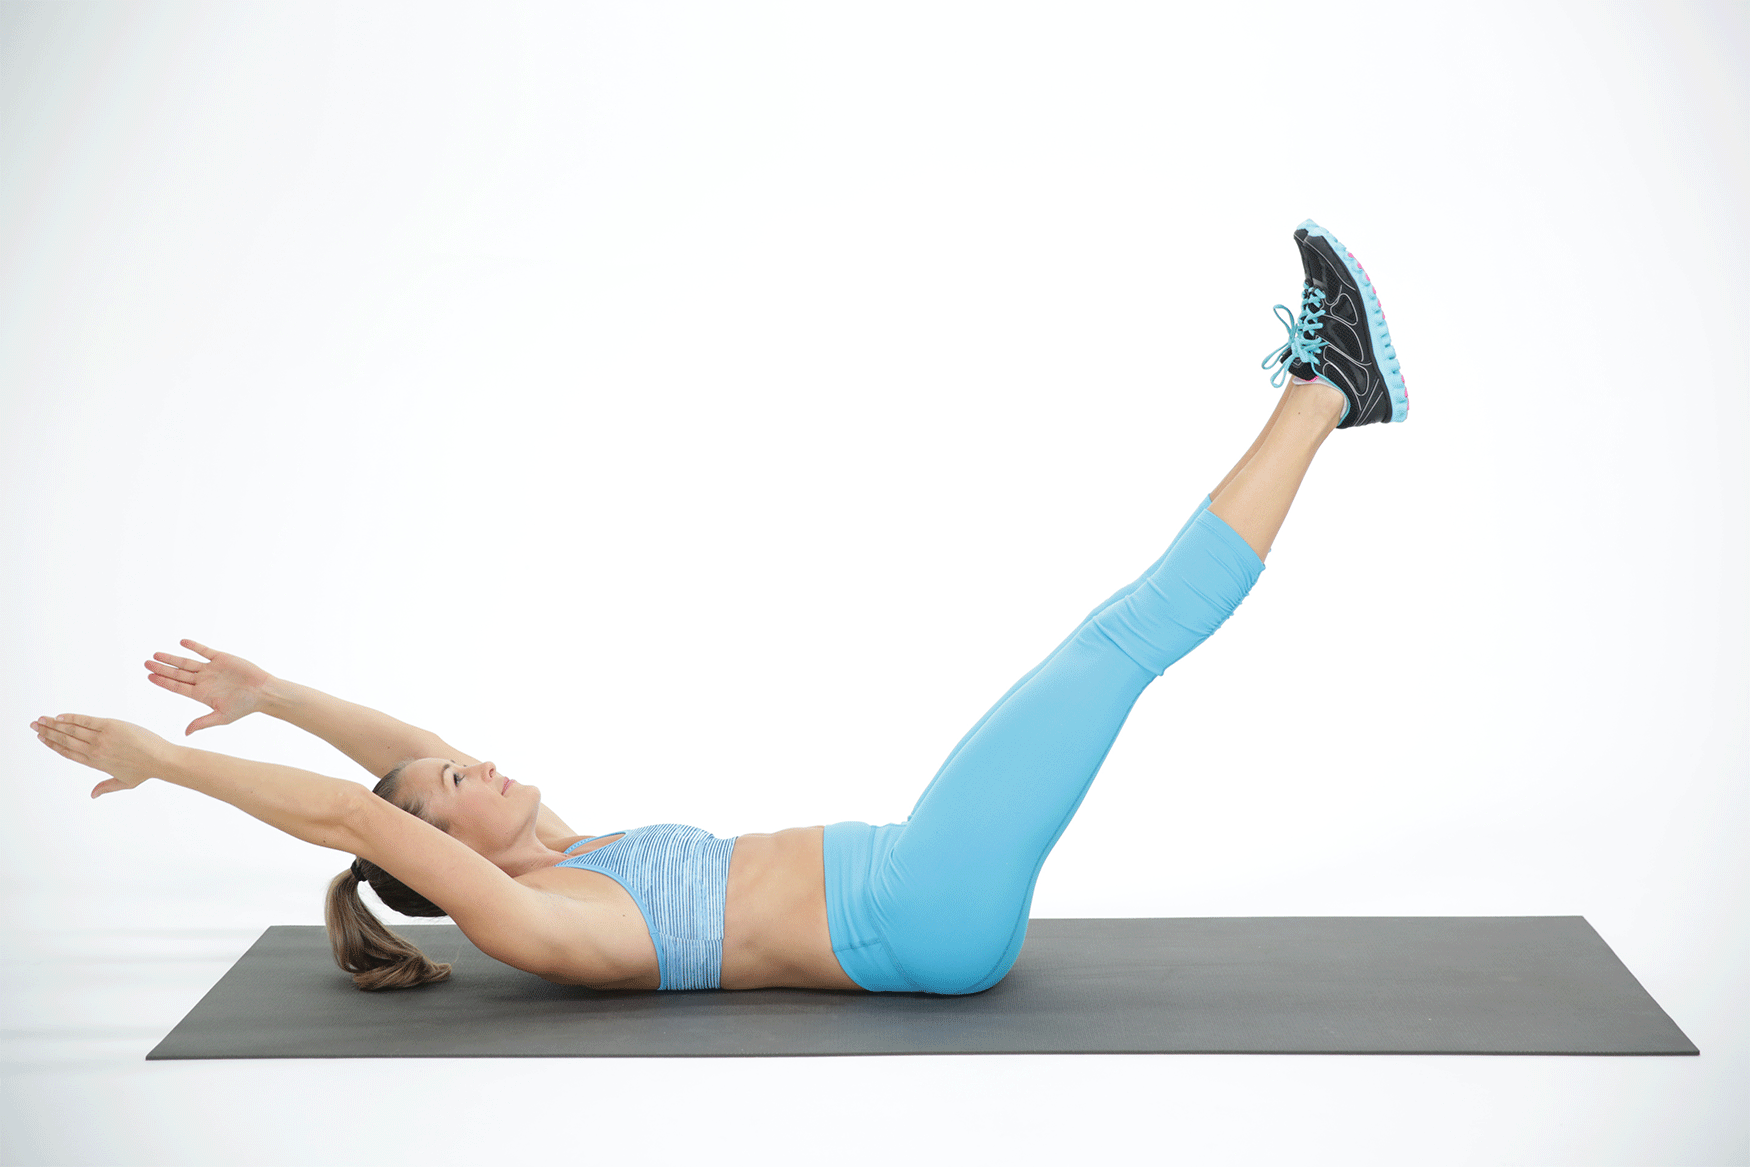
- 10 v-ups (alternate: 10 sit-ups or crunches)
This is a roughly 30 minute workout (5 rounds x 6 one-minute exercises). The goal is to do this 2x for a full workout.
Recipe of the week
This is my (not) secret chicken thigh recipe. I make up a batch for lunches most weeks.
- Roughly 2 lbs of chicken thighs, bone-in, skin-on if possible
- 3 tbsp brown sugar
- 3 tbsp paprika
- 2 tbsp kosher salt
- 2 tbsp black pepper
- 1 tbsp cayenne (i usually add another 2 tsp of red pepper flakes, as well)
- 1 tbsp garlic powder (or 1 clove of minced garlic if you’re feeling fancy)
- 1 tbsp onion powder (or a small diced onion if you’re feeling fancy)
I like to do these on my Weber kettle grill low and slow, but they’d also do fine in an oven.
- combine all of the ingredients in a gallon zipper bag, trimming the chicken if it has too much excess fat.
- mix everything up so that the chicken is well coated
- stick the bag into the fridge for a few hours (overnight is fine)
- fire up the grill and pile up the coals on one side of the grill
- add any smoking chips/chunks (apple and hickory are good) and set the grill up for low and slow (full open bottom vent, nearly full closed top vent on the indirect side of the grill). For chicken, i usually don’t bother with a water pan. I cook them between 275 and 325 for only 2 or 3 hours, so I’m not particularly concerned about maintaining an even temp.
- using tongs, add the chicken to the indirect side of the grill.
- come back 2 hours later and temp the biggest thighs in the thickest part with a meat thermometer.
- Once the biggest thighs are reading 155F at their thickest, leave the lid off the grill, adjust the coals to start burning hot again, and put the chicken on the direct side.
- After a few minutes (depends how fast the coals come up to temp), flip the chicken. You should have some maillard browning as well as a small amount of sugar burn. Pull the chicken when done.
There use to be a very attractive girl that was well endowed as the cover picture for these posts. I don’t see her anymore. That’s sad
Also fitness and stuff. I didn’t eat a cookie at lunch today. So, I’m on track to maybe lose weight at some point maybe
Sounds like you’re the Nick Gillespie of dieters.
I’m not a vegan, so no.
But, yes, I suck at dieting
So, the Robby Soave of dieting?
To be sure, following this diet does not actually result in any weight loss, but it makes you feel good about contributing to the body diverse culture.
To be sure, only white supremacists have voiced opposition to the body diversity movement. A movement dedicated toward acceptance that the alt-right has weaponized
https://thechive.files.wordpress.com/2016/07/80bc7a44743d8f2ed937d658d9332de9.jpg?quality=85&strip=info&w=600
Gee thanks. I feel motivated again
What? You talkin bout this, right?
You’re doing a great job at this trshmnstr. Very thorough and informative.
Seconded. Thanks to you and the missus, trashy!
Agreed! Thank you.
Thoughts on MFP vs Cronometer?
I think a couple of y’all use Cronometer and dig it. I’ve used MFP, but would certainly be open to a switch.
Universal reason I use cronometer 1: MFP advertises food blogs or websites with photos. Viewing food, especially “highly palatable food” triggers the lipostat to do its thing, and its thing is to convince you to eat more food.
Universal reason 2: MFP uses unverified crowd-sourced food data. Cronometer uses only from a few reputable data sources, manufacturers official information, and restaurants official data. Smaller library, but much better quality control.
Personal reason: MFP tries to be your social media helper. I’m not on social media, and don’t want it to try to hook into any of that.
What Leap said.
Thanks to you both. Downloaded.
Try them both for two days. Its not like MFP is cancer. My wife prefers it.
I’ve used it for years and aways thought it was a little inflexible. I just forgot my password so I thought I’d see what others thought of another app.
Grazie!
Do you really make an income writing genre books without a social media presence? I didn’t think that was possible these days.
The smaller library is what keeps me at MFP. I wouldn’t track if not for the ability to snap a picture of just about any Barcode and know that it will come up.
Here’s my update. My physical therapist was on vacation last week, so I just went back on Monday. This time he taped my shoulder and that’s helped a lot. It continues to improve, albeit slowly.
I also decided to switch from lower-carb to strict keto on Monday. I just felt a lot better when I did that last time. So far no keto flu, but to prevent that I took took magnesium, potassium, and vitamin C before bed last night. (I heard electrolytes might help).
Flushing all your electrolytes is one of the two causes of keto flu (confidence in this statement: 99.99%). The other cause is for a couple days you’ve eliminated carbs, which are an easy source of energy, and you are waiting for the ketone bodies to be produced (confidence: 80%). Until they are produced, you don’t have much in the way of fuel in your body. If you’ve done keto before, those bodies seem to get made faster. I used to get it bad, but I’ve slipped into and out of keto so many times at this point, I don’t get the flu at all any more.
That’s probably where I am. I don’t have a meter so I can’t tell for sure, but in the past 2 years I’ve gone on and off strict keto. Even off, I’m still eating pizza or bread once or twice a week.
I think how you feel is way more important than what the meter says. Your on-ice performance will be a great indicator of the wisdom of your approach.
Good luck!
That’s why I’m back on it. Last year I felt great in games. On tournament weekends I ate chicken salad, mixed nuts, and tea with MCT oil between games.
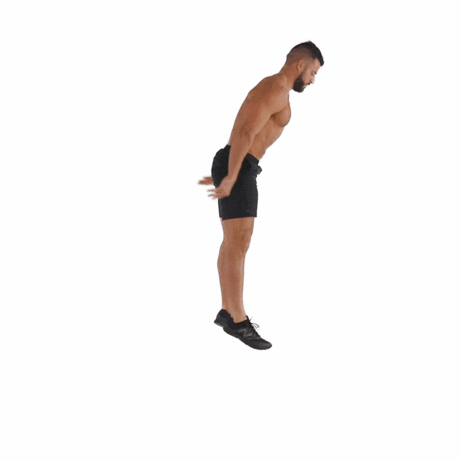
Well done including the beefcake for the few Glibs who are into that sort of thing. I try to remember to do that from time to time but always overlook it (read: get distracted by pictures of big titty women).
Thank Mrs trshmnstr. She’s the one who insisted on a few shirtless men.
I started out Monday of last week at 224. Today i was 216! 8lbs seems a bit much for 9 days. But that’s 9 full days of keto.
I also went for an hour long walk twice. did a rope suspension for an hour+ and conditioned some rope on Saturday which was a pretty serious workout. (I had 14 hanks of 30′ long rope that needed to be conditioned. It involves running one end through a caribiner, wrapping it around itself 5-6 times, and then pulling back and forth on the ends 15-20 times before moving the rope 6-8 inches and repeating. Give it a try sometime)
I stayed on track with my keto. I’ve had <20 carbs a day, and the sugar I can't avoid have been kept under 10 of those. I'm through the keto flu and already feeling more energetic.
At the very beginning of keto, you lose water weight very rapidly. Not trying to rain on your parade, but probably 7 or so pounds of the 9 is water. HOWEVER, getting rid of that bloat is a good benefit of keto anyway.
Keep it up and the fat will keep burning off!
Not raining on my parade at all. Losing too much too fast is not good from my understanding and I was more concerned from that perspective. So yeah, it does feel good just getting rid of the water weight/bloat. 6-7lbs of water and 2lbs of fat seems reasonable.
My poops are better too. Can we talk about that? Or is that verboten?
“My poops are better too”
That’s interesting. I never really noticed a better or worse quality, just a change in composition. Some people actually have to add fiber supplementation because they get blocked. Good to hear you’re not experiencing that.
As a general rule of thumb, it takes ~3500 calories to gain or lose a pound of weight. If you haven’t eliminated damn near 30,000 calories from your diet in that time period, its not all fat loss. If you want to see what day-to-day water weight change can look like, take a quick look at my link below. Every day I fast is like the first day of keto + a little fat loss, and the next couple days are putting back on the water but not the fat.
Good point. I’m also doing the “only eat from noon to 8ish” daily psuedo-fasting thing. Though I think it may be about half. Cutting out carbs and sugar has drastically reduced my calorie intake esp of the last couple of months. I’m a little scared to back-calculate what I was eating vs. what I am eating.
I agree with Q, but this was an interesting article I read last week:
How Quickly Can You Lose Weight?
Weight: 148.7#, HR: 48bpm.
Today: 6.56 mile run, 40# pack, 1:17:39, 129bpm, 11:50 min/mile
Sunday was: 100 mile bike ride, 6:46:50, 117bpm, 14.7 mph
Both much slower than normal due to Tahoe 200 (which I finished on the 11th).
Friday 8pm is AA50k, a fairly flat 10x 3.3 mile loop. It’s a race, but I’ll be happy to just complete all ten laps.
You’re amazing! Keep on truckin’!
I’ve lost a few pounds since last week. I’ve started eating a salad or bowl of cauliflower for either lunch or dinner every day. I try to reel in the other meal and eat some vegetables with it too. I’ve been snacking mainly on fruit and pickles (standard disclaimers: not a euphemism; NTTAWWT).
I’d like to lose 15 lbs over the next month and think I’ll be able to come close.
Also, today is Yom Kippur so it’s a good day for GlibFit. I restrict my diet so severely on a regular basis that it hardly feels any different.
I’m plateaued weight-wise at 230 +/- 2 pounds, but I’ve upped my jogging to six days a week and have maintained my lifting schedule. I managed to tack on a couple reps, but it’s slow going. Also, this weekend was my friend’s bachelor weekend in Ocean City, which put a cramp in plans, but I managed to not go completely off the rails. It helped that half of us have aged out of shutting down bars in OC. Happily, pants that started to fit better a few weeks ago continue to fit as expected, so I’m not backslidin’. Also, with the wife off the sauce that means my own drinking has pretty much ceased entirely other than a bit on the weekend, and I’m getting much more sleep.
Cutting booze is probably the easiest possible way to lose weight. Unfortunately, it’s a sacrifice few are willing to make.
Bike week?
I think my plantar fasciitis (sp?) is finally subsiding. I’m pretty sure the primary cause was the shoes I bought back in January. The arch support was too high and basically caused inflammation on the underside of my right foot over time, which I ignored. Oddly, it didn’t affect my left foot. Once I can afford a new pair of running shoes I’ll be back in the saddle. Don’t ignore pain, people!
I guess the upside is that I avoided running during the godawful Nashville summer heat + humidity death punch combo. I always end up sweating for a solid hour after my run, even after a cold shower. The cold water never gets cold enough in the summer.
Downside is I’ll be back at a 11 – 12 minute mile again.
Anyone else like climbing?
I like hiking in the various state forest preserves here in the Catskills, but don’t get much chance to climb the actual mountains.
I switched to zero drop shoes and mine pretty much disappeared. The only challenge is having to wear regular shoes. It almost immediately fucks me up.
Still, though, you might explore it for exercise. Also, rolling your calves and the bottom of your feet can help a lot.
Did you get your gait analyzed at a running store? It’s worth the extra money to buy the shoes there if they fit you in a proper shoe for your gait and pf issue.
/things I picked up from Mrs trshmnstr, who used to work in a running store
I’ll check out the zero drop shoes, I’ve been interested in the Xero sandals at least. Thanks Tundra.
Trash, been a while since I’ve done a proper gait analysis. The only place I know of that does them are a bit out of the ways, but you’re right that it’d be worth it.
I have a couple of theirs; sandals and hiking shoes. I also have some Merrill trail shoes that I really like. Go really slow when you start.
Still eating at maintenance 6 days a week and fasting 1 day a week. Still losing about a pound to a pound and a half a week. If you look at trough to trough, those numbers are the day after the fast. Fasting, like keto, will flush a bunch of water out of your system, so the week to week troughs represent a measurement of the same thing, and then every other day I have some water in my system that accounts for some noise on top of that.
Do you exercise on fasting day? Any problems with energy?
No exercise, not even a little bit. Yes, problems with energy. Most days when I fast, I’m fine until around 4PM. Then I start to get a little bit loopy. I feel some Jeb-Bush-Low-Energy going on, and I also just get plain old stupid before too long. So I try to get anything productive done before that happens, then I just consign the evening to playing video games, reading, laundry, etc.
But remember, I’ve been battling my metabolism for a long time, and have been on the knifes edge. Doing this confines that feeling to a few hours once a week, instead of all-day-every-day. I used to fast every once in a while when I was a fat teenager (not for weight loss.) And I didn’t have any problems with energy. Whether that had to do with not being in an energy deficit, or being a teenager, or both, I don’t know.
Interesting, thanks. I often fast before I do my midday workout, but I’ve not done a full day fast in years.
I may give that a shot.
198.6.
14.6# to go.
275.4, down 5lbs since last week. Most of it was water weight, but it’s nice to be ahead of the curve for a week. Next week is gonna suck. I’m traveling to Chicago on Sunday, so I need to be very careful to watch my food and alcohol intake.
I
Only did the HIIT workout once, and it was good. I’ll shoot for 2x this week knowing full well that sun-tues workouts aren’t going to happen.
In the past week I’ve gone from 210.6 to… 210.5.
I probably need to step up my game a bit.
Down about 2 pounds this week. By Thanksgiving the Chivettes will be posting links to this page.
Not a very good participant, but my own personal exercise routine (soccer 3x a week) got jacked up Monday night. I pulled my groin (no euphemism this time!). Spent all day Tuesday on the couch icing and resting, and I can walk today, but coughing, laughing, sitting, and standing all cause some pain.
Got up to 292 in May. Started doing 5 days of exercise per week at the beginning of August, down to 273 as of today. Also tracking what I eat with MFP.